Bathroom
What It Costs to Install a New Bathtub
02.28.2026
03.13.2025

In This Article
When it comes to making your home accessible, converting a bathroom to meet ADA (Americans with Disabilities Act) standards is one of the most impactful upgrades you can do. It's about more than just adding a few grab bars—this kind of renovation can significantly improve quality of life, providing increased independence for those with disabilities and ensuring that your space is safer and user-friendly for everyone, from elderly family members to individuals recovering from injuries.
Whether you’re preparing for current needs or future-proofing your home, understanding ADA standards and the steps required to convert a bathroom into an accessible space is key. In this guide, we’ll dive into the nitty-gritty, covering design tips, costs, legal requirements, and even financing options. By the end, you’ll understand how to make your bathroom work for all abilities.
Turn your renovation vision into reality
Get matched with trusted contractors and start your renovation today!
Find a Contractor
Let’s get into the details of what makes a bathroom ADA-compliant. The following sections will outline key areas of consideration, from the overall layout to specific fixtures like toilets, sinks, showers, and beyond.
When converting your bathroom, the first thing to consider is its overall size and layout. The ADA guidelines recommend a clear floor space of at least 30 inches by 48 inches, allowing a wheelchair to maneuver comfortably. If your space allows, even more room is ideal—this can make a world of difference when navigating tight corners or accessing fixtures.
ADA standards require a minimum width of 32 inches for doorways to accommodate wheelchairs. Hallways and spaces leading to the bathroom should also follow this guideline. Additionally, it’s a good idea to have at least five feet of turning radius, which gives wheelchair users the ability to move without restriction.
If your current bathroom is small, you might need to reconfigure the space or knock down walls to meet these guidelines. This is a more involved renovation, but one that’s critical for creating a functional space.
ADA-compliant toilets need to be set at a height of 17 to 19 inches from the floor to the top of the seat. This is often referred to as “comfort height” or “accessible height” because it makes it easier for people with mobility challenges to transfer from a wheelchair or walker.
Beyond height, the placement of the toilet is important, too. There should be a clearance of at least 56 inches around the toilet for side transfers, and grab bars must be installed for added stability. These grab bars need to be 36 inches long, positioned horizontally next to the toilet, and mounted 33 to 36 inches above the floor.
For sinks, ADA standards focus on both height and clearance. The sink should be no higher than 34 inches from the floor, and there must be at least 27 inches of knee clearance beneath it. This allows a wheelchair user to roll up to the sink comfortably and use it without obstruction.
The plumbing under the sink should be insulated or designed to prevent contact with sharp or hot surfaces. Faucets should be easy to operate with one hand, requiring minimal force—lever handles or touchless sensors work best.
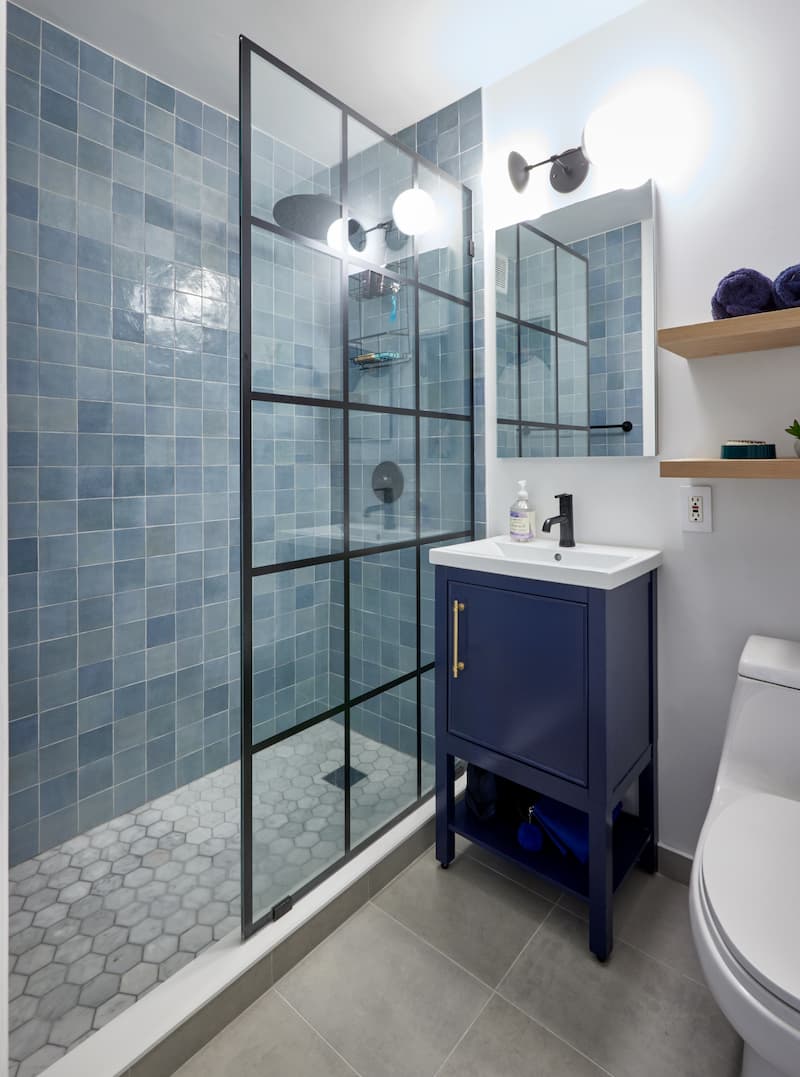
When it comes to showers, a roll-in shower is the gold standard for accessibility. This type of shower has no lip or barrier, allowing wheelchair users to roll directly in. The ADA mandates that shower stalls have a minimum interior dimension of 36 inches by 36 inches for transfer showers and a minimum of 60 inches by 30 inches for roll-in showers with a handheld showerhead that can be easily adjusted. A fold-down seat is another excellent addition for those who may not want to stand for the duration of their shower.
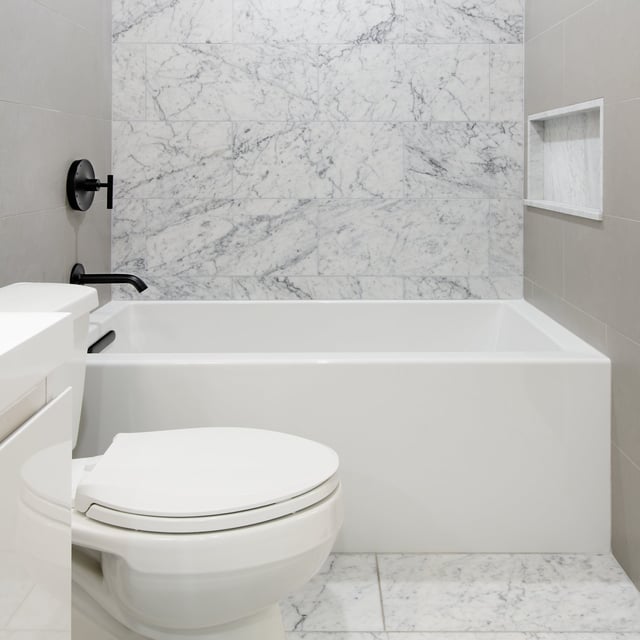
Accessibility can be achieved by installing a transfer bench in bathtubs, which allows users to sit and slide into the tub safely. Grab bars should also be installed along the walls of showers and bathtubs to ensure support and safety.
Grab bars are a crucial part of any ADA-compliant bathroom. These bars should be strategically placed around the toilet, inside the shower, and next to the bathtub. ADA guidelines specify that bars next to toilets should be at least 36 inches long, while those in the shower need to be 42 inches. The bars should be mounted between 33 and 36 inches above the floor and securely fastened to the wall to support the necessary weight.
In addition to standard grab bars, various finishes and designs are available that blend functionality with style, so you don't have to sacrifice aesthetics for safety.
Bathroom floors can easily become slippery, so choosing slip-resistant materials is essential. Tile is a popular choice, but not all tiles are created equal. Look for textured tiles or matte finishes to provide extra grip. Vinyl and rubber flooring are other great options that combine durability with slip resistance. Beyond material, you’ll also want to ensure the floor is level—any uneven surfaces can pose a trip hazard.
Good lighting is critical for everyone but is especially important in an accessible bathroom. ADA guidelines recommend placing light switches no higher than 48 inches from the floor, ensuring they’re within easy reach for someone in a wheelchair. Dimmers or motion-sensor lights can also make a bathroom more user-friendly.
Additionally, consider adding nightlights or soft lighting for those needing to use the bathroom at night. Electrical outlets should also be positioned at an accessible height, ideally between 15 and 48 inches from the floor.
Transparent Pricing You Can Trust
Converting a bathroom to meet ADA standards can range from $3,000 to $15,000, with the average cost landing around $9,000. If you're building a brand new accessible bathroom addition, costs can climb to $35,000. The total expense depends on the specific modifications needed to ensure accessibility.
Here’s a breakdown of what you might expect:
Keep in mind that the cost of materials and labor can vary depending on your location and the specific contractors you hire.
Before starting any major renovation, you must ensure that you comply with local building codes. While ADA guidelines provide a baseline for accessibility, some municipalities may have their own additional requirements. This could include permits for widening doorways, moving plumbing, or making structural changes.
Your contractor should be well-versed in ADA regulations and local codes, but it’s a good idea to ask about any potential hurdles upfront. Not following these rules can lead to fines, delays, or issues when selling your home down the line.
Renovate now, pay later
Achieve the space you're looking for today, while financing it over time with our trusted partner.*
*Not available in NYC
Learn More
An accessible bathroom conversion can be a significant financial commitment, but there are various ways to manage the costs. Here are some options:
Be sure to explore all available options to find the best financing solution for your situation.
Converting a bathroom to meet ADA standards may seem like a big undertaking, but the benefits far outweigh the challenges. Whether you’re making your home more accessible for a loved one or preparing for future needs, an ADA-compliant bathroom ensures safety, comfort, and independence.
Take the time to plan carefully, work with experienced professionals, and explore financing options to make the process smoother. Remember, an accessible bathroom isn’t just a practical upgrade—it’s an investment in your home and quality of life.
So, are you ready to get started on your accessible bathroom conversion? Let’s make your space work for all abilities today and tomorrow.

Renovate confidently with Block
Easily compare quotes from top quality contractors, and get peace of mind with warranty & price protections.
Bathroom
What It Costs to Install a New Bathtub
02.28.2026

Bathroom
Small Luxury Bathroom Design Ideas
01.29.2026

Design
How to Choose the Right Architect For Your Home Renovation
01.23.2026
.jpg?width=640&name=5301c89b-3165-4f83-af34-a6b02eaa6c48%20(1).jpg)
Bathroom
Remodeling a Bathroom Into a Wet Room - Costs & Considerations
01.20.2026
.webp?width=640&name=d8151090-d347-11eb-9d1d-3514adcc0bb1%20(1).webp)
Bathroom
Bathtub Material Comparison: Fiberglass, Porcelain & More
01.20.2026